1. Main adjustments in Lightroom
- Open up the photo in Lightroom
- Check with exposure slider what data is in the photo (especially in the dark areas - are they really dark or contain some detail?)
- Adjust White Balance - neutral with a slight blue tint
- Tine - only adjust if the image is green or magenta
- Adjust exposure for the sky (very carefull, the sky itself should stay dark)
- Dave doesn't do any sharpening (clarity, dhazing...)
- Adjust Whites (for milky way - don't blow it out!!! - might have to readjust White Balance afterwards)
- Adjust Blacks for foreground (very little - we will get more foreground details later)
- Use Vibrance if necessary
- In Lens Correction only use "Remove Chromatic Aberration" - don't use Profile Correction (this will most likely create elongated stars)
- In Camera Correction, maybe adjust blue saturation a little (could be that stars became too blue from white balance setting)
- Export this to a PSD file
- Now, in the same image, increase the exposure and just pay attention to the foreground - get some detail out (but not too much! It's dark after all!)
- Now, export this to a PDS file too
2. Fine Tune in Photoshop
- Open Adobe Bridge and select both images
- Select Tools -> Photoshop -> Load files into Photoshop layers
- Now, in Photoshop, we have 2 layers, name them "Milky Way" and "Foreground" - move Foreground to the bottom.
- First, we blend both layers using a Layer Mask. Using a White (Reveal All) mask on top of the "Milky Way" picture, we can now paint with a brush on the foreground to get the brighter foreground from the second picture. If there are small foreground details (e.g. trees or branches) it can get tricky to get those in without brightening up the sky)
- Group these two layers together - they are now our base image in Photoshop
- Now do some simple cleanup (e.g. remove plane trails with the Stamp tool)
- Now use Dave's Actions (click on "First, Use Step 1 - click here" and on the play button)
- This creates several channels that can be used to work on different parts of the image (stars, milky way, foreground...)
- Now, we always use the same approach:
- What do we want to work on, e.g. Milky Way
- Select a channel where the Milky Way is bright and the sky is dark (don't worry about other parts of the image!)
- Click on channel, click on "??"
- Go back to the Layers tab and select the adjustment that we want to make (e.g. levels adjustment to brighten the Milky Way)
- This adds a layer with the selected tool and the channel as the mask
- Now, make the adjustments (e.g. increase brightness to make Milky Way brighter) - only focus on the Milky Way and the surrounding sky
- Once we are happy with the result, we first Group these together (Layer Masks only work on Groups)
- Then we select Layer -> Layer Mask and then either a "Reveal All" or "Hide All" mask. The difference is the that first will apply the just selected adjustment to the whole picture and we can selectively blend it out (by brushing with a black brush) from areas that we don't want to. The other one is the revers, the adjustment is not applied and we can reveal it by painting with a white brush.
- Now, apply this adjustment just to the parts of the image that we wanted to apply it to. Make sure that you don't create harsh contrasts (e.g. when brightening the Milky Way, make sure that we don't create steep gradients in the sky around it).
- Repeat this for every adjustment we want to make (e.g. brighten up Foreground, darken sky, adjust color in some parts, bring out just the Milky Way core, bring out the reflection of the Milky Way in the lake...)
- Always make sure not to go overboard and create an unnatural looking image. We want to create an image that reveals details and has colors that we could see (our eyes quickly adjust to different levels of brightness or different lights)
- Once we made all the adjustments, as the final step we want to remove some noise from the foreground. Because we stretched the foreground, it's probably pretty grainy).
- First, we create a layer that assembles all layers from below (Shift-Alt-Ctrl-e)
- Then we apply the noise reduction (e.g. Nik Dnoise or Topaz Denoise)
- Then we select the channel "Noise Reduction"
- And finally we create a new layer - the selected "Noise Reduction" channel is automatically applied as a mask to this layer.
That's it!!! Again, I really like Dave's very methodical approach:
- choose which adjustment we want to make
- select and appropriate channel that will reveal this element
- make the adjustment
- use a Layer Mask to now apply this adjustment only to the part of the image that we wanted to
- lather-rinse-repeat
Finally, we can sharpen the image for different formats (e.g. web, poster...) using TKActions for Web or resize10 from ON1 for printing posters.
Here is an example:
First, in Lightroom
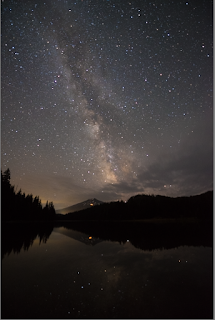
1. Original Image

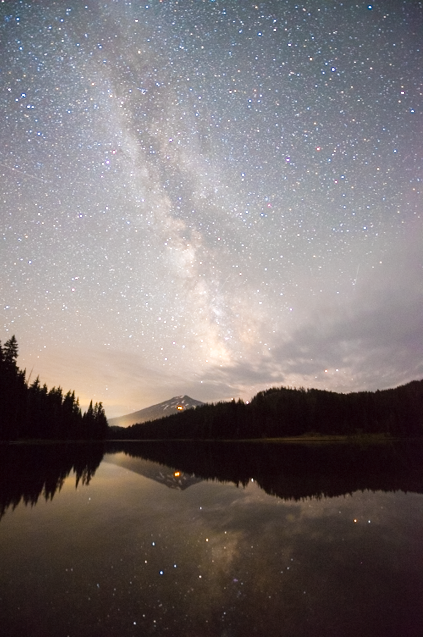
2. Increasing Exposure

3. Adjusting Whites

4. Adjusting Blacks

5. Increase Vibrance

6. Remove Chromatic Aberration
7. Increase Blue Hue

8. Increase Blue Saturation

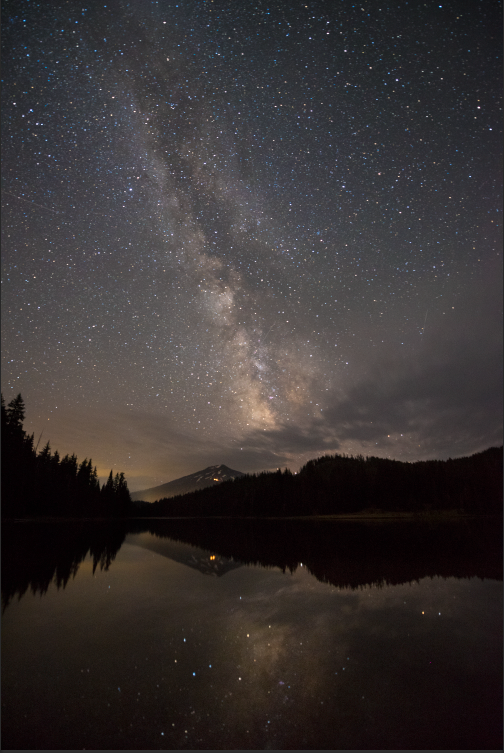
saved this image for background
9. Increase Exposure

saved this image for foreground
Now, I loaded them in Photoshop:
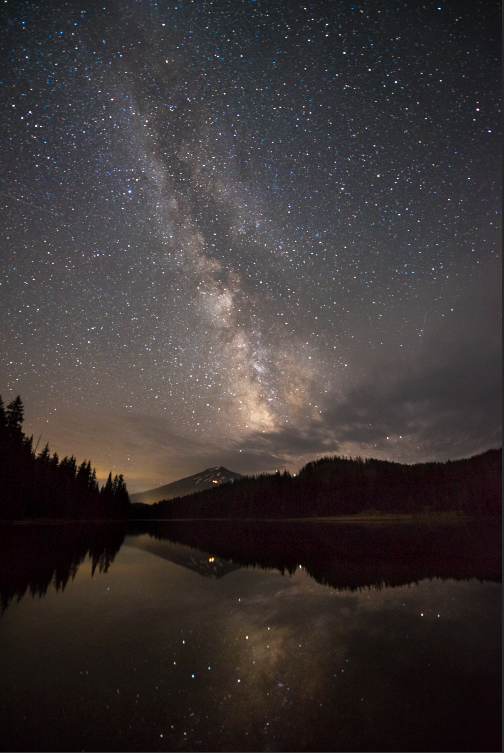
10. Combine them (foreground and background)

11. Milky Way Brighter

12. Sky Darker

13. Trees Brighter

14. Pop Stars

15. Increase Contrast (curves)

16. Decrease Noise in Foreground

Overall:
Continue on 3rd night: Crater Lake
Here is an example:
First, in Lightroom
1. Original Image

2. Increasing Exposure

3. Adjusting Whites

4. Adjusting Blacks

5. Increase Vibrance

6. Remove Chromatic Aberration

7. Increase Blue Hue

8. Increase Blue Saturation

saved this image for background
9. Increase Exposure
saved this image for foreground
Now, I loaded them in Photoshop:
10. Combine them (foreground and background)

11. Milky Way Brighter
12. Sky Darker

13. Trees Brighter

14. Pop Stars

15. Increase Contrast (curves)
16. Decrease Noise in Foreground

Overall:
 |  |
| Before | After |
No comments:
Post a Comment